Wednesday, 22 of January of 2025

Keyboard Control: The Power of Shift

In this article I go through all the uses of the Shift key from the basic queueing of move commands to advanced techniques like "Smart Blinking".

In another article (“Getting Used to the Keyboard in Starcraft 2”) I talked a little about the Shift key and if you have been playing SC2 for a while you probably have a bit of an idea of how versatile it can be. Players are still coming up with creative new ways to use the functionality of the Shift key, it’s just such a great tool. If you are keen to improve your play, then you should try and take advantage of what the Shift key can do for you.


What the Shift Key Does

Before we move onto all of the nifty things that you can do with Shift lets take a brief moment to understand the mechanics of what it actually does.

Shift basically ‘Adds’ something to a list

In nearly all situations holding ‘Shift’ tells the game to ‘add’ something to a list. This list could be a list of commands or it could be a list of units/structures. There are a few situations where it acts a little differently but this is its main function. For example, ‘Shift-clicking’ a Marine whilst already having a Marine selected adds it to your current selection group. However, ‘Shift-clicking’ an already selected Marine will Deselect it. So in that situation it acts in reverse to its normal function.

Shift can be combined with other Keys

Using the Shift key with other keyboard keys can produce some interesting results. For example, “Shift-[Control group ‘1-0’]”. While ‘Control-[1-0]’ creates a control group, using Shift with a control group number will ADD the current selection to that control group. Use this frequently to ensure that all of your units are bound to a control group.

Now that we have that covered we can move on to the ways that you can use the Shift key to ‘pwn n00bs’ in SC2.


Using the Shift Key: The Basics

The following uses for Shift are more than just ‘cool’ or ‘tricky’, these are the crucial things that you should use every game if you want to play well.

Hands Free Scouting

You can queue up multiple move commands with any unit by holding the Shift key and right clicking for each point you want the unit to move to. Using this your unit can scout for your enemy’s base, proxy buildings and expansions without your direct control, freeing you up for more important things. You can even do this via the mini-map!

Attack-Move Scouting

This is merely a variation on the previous Shift technique. Instead of queueing up multiple Move-commands you can queue up multiple Attack-move commands. Simply press ‘A’ (or your equivalent attack hotkey) and left click each point you want your unit to attack move whilst holding Shift. You can use this technique to find and attack any stray workers or Overlords around the map. Having a few units Attack move scouting around the map can really help you maintain map control and deny your opponent’s scouting attempts.
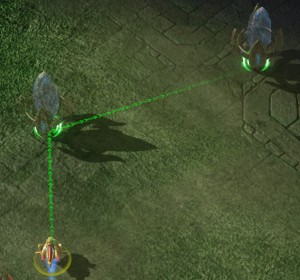
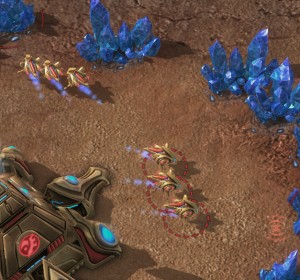
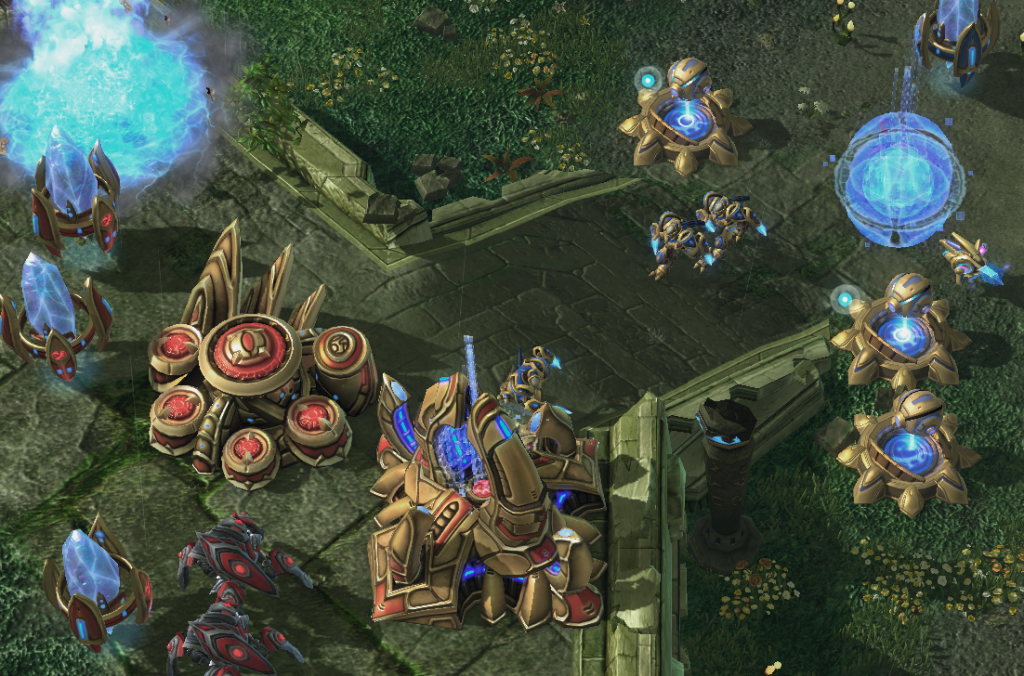
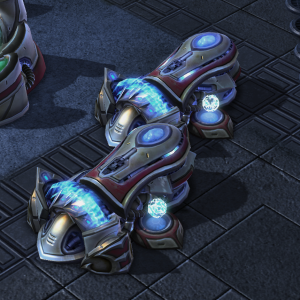
Queue up multiple construction orders to quickly set up a base as Protoss.

Queuing Buildings

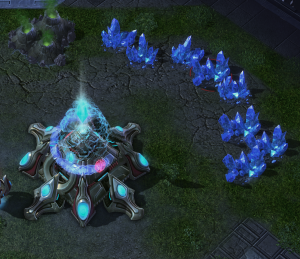
This works best for Protoss and can be useful for Terran but if you’re Zerg you’re not going to get too much use out of this one. To do this simply hold shift every time you place an additional building and your worker will add them to their ‘to-do’ list. I’ll run with the Protoss example because it works so nicely for them. You can tell one worker to build a heap of Pylons at once or you can easily place different buildings such as a Pylon, a Nexus and 2 Assimilators (Instant Expansion, just add water!™). It works the same way for Terran, but much more slowly due to the worker having to physically build each building. Unfortunately for Zerg each Drone can only morph into one building.

Automatic Return to Mining

This is most useful for Terran, quite useful for Protoss but, again sadly, of no use to Zerg. Once you give the order for a worker to construct a building hold Shift and Right-click a mineral patch. Once your worker is finished building he will return to mining with no downtime. You should be doing this 100% of the time, so start getting into the habit!


Using the Shift Key: The Fancy Stuff
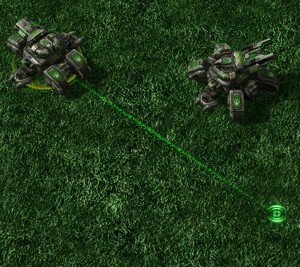
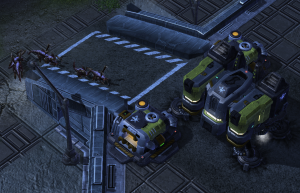
Leapfrogging Siege Tanks is much faster using Shift.

The following uses of the Shift key can be extremely useful but usually only in a very specific circumstance. Take the time to learn the ones that are relevant to you Race and play-style.

Easy Siege Tank Movement

Using Shift you can tell a tank to un-siege, move, and re-siege on arrival. Moving your Tanks in this way allows you to leap-frog your tanks towards your opponent much more easily.

To perform this technique you select a Siege Tank and whilst holding shift  press ‘D’ (Un-siege), issue a move-command and then press ‘E’ (siege-mode).  A tank army pushing forwards using this technique can be quite hard to engage.

Smart Blink

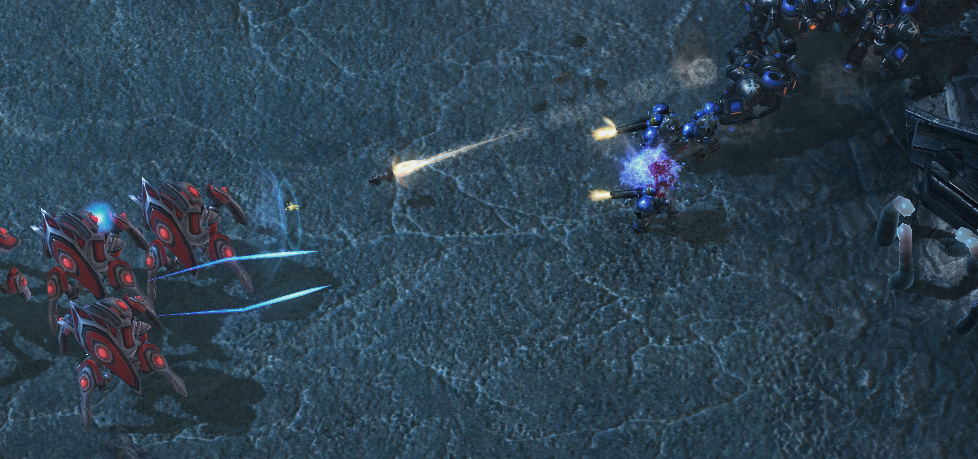
This technique allows an entire group of Stalkers to Blink across a gap one at a time without leaving any behind. It is quite a complex technique to explain and its best done in this video by StarcraftScientist. This is an awesome technique to watch and even better to execute.

Overlord Creep Highway
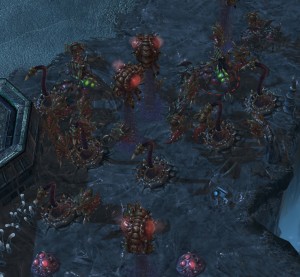
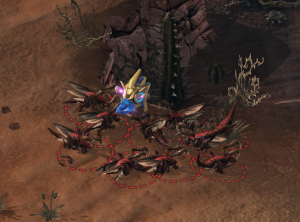
Spine Crawler, Hydra, Queen pushes are only possible with a fast creep highway.

You have probably watched Fruitdealer or another top Zerg player use Overlords to make a creep highway to their opponents base, but if you have attempted it before you probably realised how fiddly it is to tell each Overlord to go to each point along the highway.

However, there is a much faster and easier way to do this. Select a large group of Overlords and tell them to generate creep. Now send the entire group to the first point on your highway. Now, holding Shift, de-select one Overlord and then tell the rest of the group to move to the next point. Continue for each point along the intended highway.

It only takes a few seconds to set this up and the result is that the entire group travels along the highway leaving one Overlord behind at each point.

Move To and then Patrol

Using the patrol command will cause a unit to patrol between its current location and the selected one. Using Shift you can tell a unit to move to a location and then patrol from that location. Simply tell the unit to move where you want it to start patrolling from then hold Shift and press “P” (Patrol) and left-click where you want the unit to patrol. You can use this technique to easily tell a unit to patrol between two of your opponents potential expansion locations.

Kill That Constructing SCV

Ever notice that your melee unit stops attacking the constructing SCV when it moves? Simply hold shift and tell your unit to attack it multiple times. Your unit will now follow it whenever it moves. Deny the Terran’s wall-off with 50% more ease!

Rally to Your Units

You may already employ the tactic of attaching a rally point to a unit so that your forces stay together even when you move your army. But what happens when that unit dies? You lose your rally point. This can be especially painful when you lose a battle because half of your units are back in your base.

To avoid this you can select a building, hold Shift and Right-click on multiple units. Now if one of those units dies, your newly built units will still move to your army. Unless of course your entire army dies.

Easy Drops

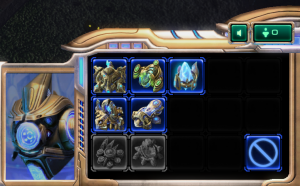
Want your untis to drop as soon as your Medivac/Overlord/Warp Prism arrives? Simply tell your loaded transport to fly to where you want to drop, hold Shift, Press “D” (Drop) and left click at the drop point. With the Warp Prism you can also hold Shift and press “E” to tell it to enter Phasing mode after it unloads.

Similarly, you can tell a Viking to fly to a location and then transform upon arrival using the same technique of Move > Shift + “D” (Assault Mode).


As you can see there are a lot of useful and creative uses for the Shift key. I am sure that there are even more creative uses that are yet to be discovered. Do you know of any other uses for the Shift key? If so let me know about them in the comments below!


Understanding the Learning Process in StarCraft 2

In this short article I highlight an important point: that too much time is spent on only half of the learning process. This problem is hampering the progress of a lot of new players. Read on to find out more.

I recently had an interesting knowledge management class in which we discussed the concept of knowledge within a community of practice (ie. a group of people who practice within a particular field) and how experience affects knowledge. As per usual I choose to think about this in relation to Starcraft instead of the business world. ^_^ There is one particularly good quote which sums up what I am talking about, try to see if you can figure out how I applied it to Starcraft.

“When we learn a discipline whether at school or on the job, we learn more than facts, ideas and techniques. We enter a territory already occupied by others and learn by participating with them in the language of that discipline and seeing the world through it’s distinctions. We learn a way of thinking.”

There are quite a few points for discussion but I am going to focus on what I feel to be the most relevant for someone learning Starcraft 2: the aspects of the learning process and how they relate to your in game improvement. Why is this relevant for someone who wants to become a good Starcraft 2 player? A common thing that holds players of all levels back is that they only focus on one particular area of the entire learning process.

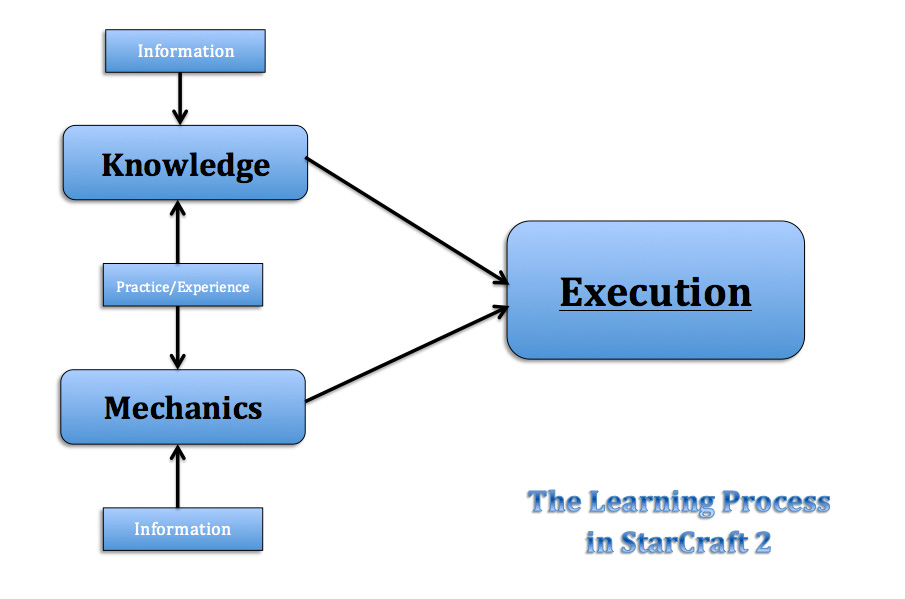
I tried to drill down to the most important aspects of the learning process as it applies to Starcraft 2 and this is what I came up with (in nifty diagram format):


Combine the information you receive with practice and experience to get Knowledge and Mechanics, combine your Knowledge and Mechanics to get Execution.

Usually, the first thing new players do when they want to learn StarCraft 2 is to seek out information. Information is all well and good but by itself it cannot achieve much (notice that information is not connected to execution in the diagram). For example you may read or see in a video that constantly building workers will help you do better in the game. However, until you have actually practiced constant worker production you will receive no benefit from that information.

When you combine information and practice or experience (experience is more closely linked to the knowledge side of the process) you will improve in either knowledge or mechanics. However, to have good execution in game (execution is how you actually carry out your planned strategy) you have to have good knowledge AND mechanics. Try to think of execution as being 50% knowledge and 50% mechanics (whether this is the case or not).

This is where the problems commonly arise for new players (and probably experienced players too). It is too easy to get stuck focusing only one side of the learning process, usually the ‘knowledge’ side. Too often players with poor execution focus only on trying to find the ‘best’ strategy or build and neglect the mechanics side of the game. If we keep in mind that ‘knowledge’ is only 50% of the equation then its easy to see why this can hamper our progress. It may seem that I am mocking newer players, but I too suffer from this imbalance in learning. If my mechanics were to instantly catch up to my game knowledge I would probably be in diamond tomorrow (I am now in Silver after my recent promotion ^_^).

Make sure you balance your time between practicing/researching strategies (Knowledge) and practicing/refining your core gameplay skills (Mechanics).

So what can we do about this imbalance in the learning process? Simply keeping in mind that knowledge is only half of the process is a good first step. If you find that you are spending most of your time looking up or practicing strategies try to instead put some of your time towards practicing your mechanics. A good way to do this is to focus on one particular mechanic for a series of games, for example, making sure that for the next 5 games you are constantly building workers and then for the five games after that make sure that you are spending all of your minerals. Then go back to practicing your strategies for the next 10 games. If you keep your learning time balanced like this you will see your self progress at a much faster rate.

You may have noticed that this article was a lot shorter than usual, I realised that this topic had a severe chance of suffering from the dreaded TL;DR. To avoid this I tried to keep it short and to the point. However, if you want to know more do not hesitate to ask questions in the comments below. I will always take the time to respond if you take the time to comment.


Let’s Make SC2 eSports Happen!

In this article I discuss what you can do to help Starcraft 2's eSports scene grow and prosper.


Chances are that if your’e reading this you spend as much or more time watching Starcraft 2 than you do playing it. The game has been designed with the intention that it would grow to become a spectator sport so it’s no wonder that it’s so great to watch. The future of Starcraft 2 and eSports in general is looking pretty bright, and I think that if everyone becomes just a little more active, we could see Starcraft 2 become as well known as any other major sport.

A lot of you are probably pretty excited for a future where we see major Starcraft 2 events on TV, but it’s not going to happen unless we make it. If you’re keen to get involved and make eSports happen read on and find out what you can do.


Support, Subscribe and Share

YouTube and other similar video services collect statistics on the amount of views, ‘likes’, and subscriptions that particular channels or videos receive. Investors and sponsors look at these statistics when deciding whether or not they are interested in becoming involved in the industry. A lot of interest in a particular market means a higher potential return on their investments. Advertising can be annoying but the money it generates for the industry is what fuels the growth we want. So if you see a YouTube channel you like; subscribe to it, ‘like’ their videos and share them with your friends.


Discuss the Game

I highly recommend that you get involved in the discussion in one or more of the great communities that exist. Forums like TeamLiquid.net are a great place to discuss every aspect of the game and to find out about events, new casts and a heap of other Starcraft goodness. Just remember that a mature, professional community will help give Starcraft 2 and eSports a good image.


TeamLiquid.net is the largest SC2 Forum in the West.

Watch the Livestreams AND the Ads

Many top level players stream their laddering or practice sessions to the community, these streams are both an excellent resource and a great way to kick back and relax. Support these players by watching their streams, participating in the chat and, most importantly, disabling your adblocker. Watching 20-30 second ads every now and then may seem annoying but in most cases this is one of the main income streams for a lot of top-level players. The less people that watch their ads the less time they will have to dedicate to Starcraft. If we want Starcraft 2 to become a serious eSport then we need to make sure that our top players can at least make a living from it.

If you follow me on Twitter I will tweet links to whatever stream I am currently watching, otherwise you can find out who is streaming at TeamLiquid.

Participate in Tournaments

There are nearly always entry-level tournaments happening at any given time. Sign up for one and have a go, they are free and a lot don’t offer prizes but they are a lot of fun. I have played in the SEA BSG (bronze, silver, gold) weekly tournament before and I plan on doing so again in the future because it was a ton of fun. But even if you don’t want to play in the tournament you can always help organise, spread the word or just watch the games. A lot of new casters start their careers in small tournaments so help them out by watching their casts.


Watch the Major Events

What’s more exciting than watching the best of the best duke it out in a major competition? Doing it whilst knowing that your helping eSports grow in the process, that’s what!

Websites like GOMtv.net broadcast major Starcraft 2 events from around the world and usually offer both a free viewing option and a paid premium service. If you can afford the premium service go for it, remember we are trying to help something that we love grow. But if you’re on a tight budget like me then just watching the free streams will still help raise more revenue for these events.

TSL starts at 2pm ET on Saturday the 19th of March, make sure you check it it out! You can find out about other upcoming events on the Team Liquid Calendar page.


Directly Contribute

If you have technical or artistic skills and some spare time, then why not contribute directly? A good place to start would be the Team Liquid Forums, there are often people asking for help on particular eSports projects like this one. If you are lacking in the skills or time departments but have some spare cash floating around why not sponsor a small tournament instead? Just having a $50 prize pool on a weekend tournament can make things a lot more interesting. Alternatively you could donate to someone who you think is working hard for eSports, often these people rely on donations and other small income streams to keep on doing what they are doing.


Tell Your Friends and Family

This one can be hard because of the feeling that gaming is something that should not be taken seriously. Unfortunately a lot of people do feel this way and the only way we can change that is by telling them about what we love with pride and conviction. If we treat gaming seriously then at worse people will be forced to respect the love that we have for the game, and who knows maybe your family/friends will actually be quite supportive. I have been surprised at how many people have been really supportive of my interest in SC2 and eSports. Of course there has been people who just don’t get it, you just learn to move on.

If you are not feeling confident in your SC2/eSports pride then watch Day[9] Daily #100 “My Life of Starcraft” and listen to his story, I found it quite inspiring. (Warning: Be prepared to laugh, cry and maybe even fall in love.)


What do you foresee as the future of SC2 and eSports? Let me know in the comments below. You can further help by sharing this post with your friends!


The Little Things You Can Do to Get an Edge in StarCraft 2

In this post I share some of the subtle things that you can do to give yourself an edge over your opponents in Starcraft 2.

There are many things that players do to get an edge over their opponents in Starcraft 2. Individually these wont take you from bronze to gold, but when combined they can give you a decent advantage. Normally, you would pick up these nuances through experience and by watching other people do them, but this can take a while. Instead I thought I would save you the time and just share them with you here. Aren’t I nice?


‘The Split’

A perfect 'Half and Half' split. Not mine of course.

How you send your initial six workers to mine seems like such a small thing and really, it is a small thing. If you box select all of your workers and send them to a mineral patch they will sort themselves out, but this can take a few seconds. To correct this players perform something known as ‘the split’. The specific impact of an effective split is allowing you to start production of your second worker as soon as the first finishes. Take note: Start building your first worker before you send your workers to mine.

The two most common variants of ‘the split’:

  • ‘The Half and Half’ – Box all six workers and send them all to a mineral patch to the left of the middle, then as they are traveling box select three and send them to a patch on the right side of the middle. The workers will still have to sort themselves out but much less so than normal. This method is popular because it is relatively easy if you are fairly accurate with you mouse.
  • ‘F1 and Send’ – This method speaks for itself, simply press F1 to select a single worker and then send him to a mineral patch. Repeat for each worker, sending each to their own mineral patch. This method is less popular than the ‘half and half’ method because it requires you to be fast and accurate enough to do effectively.

In the beginning practice each a few times against the AI and select whichever one you find the most comfortable. Over time you will find that you will naturally develop your own version of one the above methods.

Edit 1/7/2011: A helpful reader, Jeffery, pointed out that a study of split has shown that the benefit gained is very small. As such, it’s entirely possible for you tip skip this tip completely. I have decided to continue splitting my workers anyway, a decision that seems to be echoed by others. I find it a fun way to start the game and it has become a part of my warm-up routine. It’s also wise to not underestimate the power of being a little bit fancy. Thank you, Jeffery, for the helpful feedback! It goes a long way towards making my site a better place to learn SC2.


Rallying Your Workers Correctly and Creating ‘Worker Pairs’

Rallying the first two workers that you build to empty (not being mined from) mineral patches can give you an extra economic advantage at the beginning of the match. At that point in the game you are not usually doing anything else anyway so there is no reason to not do this.

The second part of this is creating ‘Worker Pairs’. Worker pairs are two mining workers that are perfectly in sync, that is, right as one worker finishes mining the other one begins. Workers will eventually pair up themselves, but only after considerable shuffling about. You can manually create a worker pair by rallying a worker that is about to finish building to a patch that has a worker that is just about to finish mining. This will take some practice to get the timing down. You should only worry about this if you are not doing anything else at the time. Although it will help your income it is not significant enough to get distracted over.


‘Maynard Transfer’

Try to time your transfer so they start mining right as it finishes. Profit!

Named for its creator, the Maynard transfer involves overproducing workers at one base so that you can transfer them to an expansion base when it completes. Transferring workers in this way means that you can start reaping the economic benefits of an expansion immediately.

This technique is the standard now for nearly all top players and you should be doing it too. Simply continue producing workers at your main base and then transfer over 10-15 workers from your main to your expansion. Do this every time you expand and your economy will never dry up. This is also another great reason why you should never stop building workers.


Starting Buildings Right on Time

This is one of those things that will really make a noticeable difference, namely in how fast you can execute your build You want to start construction of each building at the exact moment that you have enough resources to do so. Basically, you always want your workers to be building right underneath themselves, every second spent travelling to build is wasted time.

In order to do this send your worker out to where you want to build the building before you have the correct amount of resources. Ideally you want your worker to arrive right as you get enough to build. But this sort of accuracy takes experience and practice, so don’t stress too much if you don’t get the timing right at first.


Giving Your Ranged Units Space

This one may not be as little as the others, because it can provide a great number of benefits. What happens normally is that your units will get rallied to a point in or just outside of your base where they end up in a big bunch. The problem with this is that they have no room to manoeuvre around or retreat if the opponent attacks, severely limiting their effectiveness.

It is much better to get into the habit of moving your units out towards your enemy, particularly if they are ranged units. Doing so gives them room to move around, gives you the space to kite enemy units (attack while staying out of range of their attacks) and it gives you an early warning of incoming attacks. Once you do spot an attack you can simply pull back to defend. Doing this has also seemed to help with breaking the passive mindset that has been a problem for me since I first started playing.

In Daily #189 “Newbie Tuesday: Losing to Early Pressure” Day[9] discusses how moving out with your units can help you deal with an early attack. Definitely worth checking out if this is a problem for you.


Stalkers out range Marines so you should always move them out against Terran.


Compensating for Lacking Hand Speed

This is a technique that you should employ if you find that you are simply not fast enough to keep up with the build you are trying to perform. If you are not fast enough what happens is that your resources will begin to build up simply because you cannot build as fast as the person who created the build. Remember, not everyone can play as fast as the pros. The problem is that most new players will not compensate for this difference in hand speed and will just ignore or waste the extra resources.

All you have to do to compensate is to add an extra production facility to your build so you can spend those extra resources. It is much better to do the build ‘incorrectly’ and spend that extra money rather than to just ignore it and try to play faster. Being aware of your limitations is a good skill to have! If, over time, you find that the extra production building does not see any use then you are most likely getting faster and you don’t need to compensate any more.


How familiar were you with the tips in this article? If you know of any more let me know in the comments below, I’d love to hear them!


Sun Tzu on StarCraft 2

In this article I share some advice from Sun Tzu's "The Art of War" and discuss how it works in StarCraft 2.

Sun Tzu’s “The Art of War” has been read and interpreted throughout history by many different people for many different purposes. Occasionally, in between University, Work, Playing SC2 and writing about SC2 I find a little bit of time to read (on my lunch break at work if there are no new Dailies). Reading through one particular section of this book I couldn’t help but apply it’s lessons to SC2 because it was just so clearly relevant. In this particular section Sun Tzu states the best things a general can do in war in descending order.


“Thus the highest form of Generalship is to balk (destroy) the enemy’s plans.” – Sun Tzu

This is the moment when you cheer as Terran, an almost guaranteed victory!

To destroy your opponents plans is clearly the best thing you can do in Starcraft 2. Note that Sun Tzu says to destroy your enemies plans, not just to counter them. Generally, countering implies that you merely defend or survive – not really the best thing that you can do. But to destroy your opponent’s plans puts you in a dominating position in the match which is where you always want to be.

A good, but extreme example of destroying an opponent’s plans would be having your opponent’s 6-pool rush reach your base after you are completely walled in. Anyone who has been in this position will know that you are at a massive advantage at this point. You haven’t just countered your opponent’s plans, you have destroyed them. Even in less extreme examples having their plans destroyed will throw off all but the most experienced of players. It can be very hard to formulate a new plan mid-game, so take advantage of that.

You can achieve the destruction of your opponents plans in SC2 by scouting, covering your vulnerabilities (adequate detection, anti-air etc.), and by always being aware of what your opponent could do — this means having prior knowledge of the possibilities at any given point in the match. This type of knowledge comes with experience and research.


“The next best is to prevent the junction of the enemy’s forces.” – Sun Tzu

Pick off every undefended unit you can, this Probe is extra valuable because he is also holding a little gift of minerals.

If you fail to destroy your opponent’s plans or if your opponent plays straight up without any ‘tricks’ then this is your next best step. In war, cutting off your enemy’s supply lines or reinforcements would give you an obvious and great advantage. And it works much the same way in StarCraft 2. Simply, its all about not letting your opponent’s army reach its greatest potential strength.

You can achieve this by harassing your opponent, attacking and retreating (particularly against Zerg as it forces them to waste Larvae on defensive units) and by picking off all undefended units or structures. All of these things will weaken your opponents overall army strength as well as their resolve. Utilising highly mobile units (Blink Stalkers, Medivacs, Hellions, Speed Zerglings, Mutalisks etc.) is the key to succeeding in this style of indirect engagement.

This is the method I favour in most of my matches, I always attempt to destroy my opponents plans first but lack of experience often makes this difficult. Letting your opponent mass a powerful army without any intervention is nearly always a bad move, if you have ever had a maxed out Stalker/Colossus army bear down on you then you will know why. Suffering this too many times I have resolved to always pressure and do everything I can to reduce my opponents ability to mass an army.


“The next in order is to attack the enemy’s army in the field.” – Sun Tzu

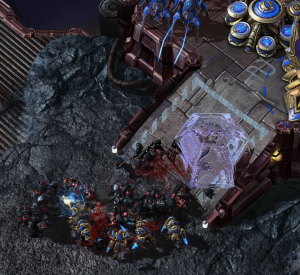
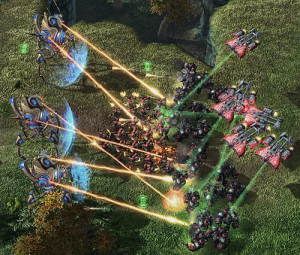
Having Zealots flank an attacking army like this will deny their retreat whilst you cut through them.

If you allow your opponent to amass their forces unopposed, then a straight up engagement in open ground is your next best option. In this situation the winner will be the player: who has the best unit composition, who can micromanage their army better and who can best continue production to reinforce their army throughout the conflict.

Why should you ever let the situation get to the point where you and your opponent are in equal positions? It is always better to be in a dominant position in each match. However, your opponent will be making their own efforts to get an edge over you and it is sometimes unavoidable that you will need to enter a battle on (nearly) equal grounds.

In this situation there are a few things you could do to tip the scale in your favour;

  • Position your forces well just before the conflict ensues (such as creating an arc with your ranged units and moving your melee units to the front),
  • Send some units to flank and trap your opponents forces, and,
  • Take advantage of terrain such as high ground, choke points and visibility blocks (smoke or grass).

Using these tactics you can turn an equal situation into a one sided victory. For an excellent example on how to do this as Zerg against Terran see Benji’s Guide on How to Control Zerg Units.


“And the worst policy of all is to besiege walled cities.” – Sun Tzu

What if your opponent amasses their forces but does not leave their, well defended city? The most common reaction in this situation is to attack their base. In StarCraft 2 when your opponent is being completely defensive you should realise that you have the advantage. Attacking your opponent at their base where they have defences effectively hands that advantage over to your opponent.

Why attack this straight up? He isn't going anywhere anytime soon.

So instead, use the fact that your opponent is not putting pressure on you to secure a long-term victory. Attrition is the name of the game here, starve your opponent of resources and deny their attempts at expansions. At the same time you should expand yourself, improve your tech, research upgrades and create a formidable army. Whilst doing this probe for weaknesses in your opponents defences with gentle harassment, this will force them to plug those gaps with more defences — further weakening his army. Put pressure on your opponent but never feel like you need to break in and kill them, instead let them kill themselves with their passivity.

Eventually your opponent will have to move out, as they will have exhausted their resources and if they delay attacking any further they will become weaker and weaker. Usually this attack will come in the form of a ‘doom push’,  just remember that although this may be hard to deal with your opponent has no capacity to replenish their forces. So just whittle them down slowly or if they head straight for your main base you should simply fall in on theirs. Because of the amount of expansions you should have by this point and with your ability to restock your army you should have no trouble destroying their base first.

So don’t waste your army against a walled in opponent, if you have ever attacked a turtling Terran player with siege tanks and turrets ringing their base you will know how little you can achieve and how swiftly defeat can follow. Take the advantage when it is given to you and don’t give it away for nothing.


I recommend that anyone interested in strategy (that should be you!) should read Sun Tzu’s “The Art of War” for themselves. It’s one of those things that you read and then it becomes a part of your character, helping you in any area of your life where a strategic decision needs to be made. And its like $10 on Fishpond with free postage in Australia, so you have no reason not to. On that note I also recommend “Go Rin No Sho” (“The Five Rings”) by Miyamoto Musashi, it talks about mentally dominating your opponent and seizing any advantages you are given. It’s probably my favourite book in this genre.


At which of the above points do you have most of your wins? Do you scout well and destroy your enemy’s plans? Or do you engage in the field and win with superior tactics? Which one do you most commonly lose to? Comment below and let me know!


Preparing for Starcraft 2’s Multiplayer

In this article I will discuss what you can do to prepare for online multiplayer in Starcraft 2.

I recently had a very good question asked of me on the SEA Forums. BlackTalyn, who had not yet started online multiplayer, wanted to know whether practicing against the computer AI was a good way to prepare for online play, or whether it would teach bad habits. He also wondered the same about practice league. Knowing that he was probably eager to get started I provided a short answer, but I also wanted to write a more detailed response here as it is quite a relevant question for brand new players. So in this article I will discuss the above options for preparing for multiplayer as well as a few more.


Playing the Computer AI

Playing against the computer AI can be an excellent way to prepare for online multiplayer provided you are aware of the differences between the AI and human players. Basically what you do to defeat the AI is quite different from what you will have to do to defeat a human opponent. The AI is predictable and uses very simple strategies that do not employ any of the tricks that human players use.

What is good about playing the AI:

You will never see the computer AI Proxy Zealot-Cannon rush like this person.

  • Learn the units, hotkeys, and mechanics of each race with no pressure. I highly recommend playing at least a few games as each race before you decide which one to play online. See my article on the three races for more info on choosing a race.
  • The AI (Medium and Hard) will do frequent and decently sized attacks. These attacks are predictable but can still be pretty hard to defend if you do not play well enough. If you can defend these attacks you are on your way to doing so online.
  • You can practice you’re opening over and over. Set the AI to very easy and you can practice and practice until you’re opening is smooth. The first 10 mins of online games can be quite difficult when you first start, seconds can mean the difference between losing or defending an early attack. A tight opening can help you dominate this portion of the game.

I recommend playing against the AI for a while before going online. Before I went online I played a few games against the Easy, Medium and Hard AI and it helped me build my familiarity with the game and get my confidence up. Just remember that the AI cannot prepare you for all of the wacky and tricky things that your opponents will do online.


Challenges are mainly micro-focused.

Completing the Challenges

The challenges are a series of specially designed scenarios for the purpose of practicing certain skills. They were added to the game by Blizzard to help prepare new players for online play, so use them!

If there is a problem with the challenges however, it’s that they too heavily emphasise micro (unit control) which is actually less important for beginners then macro (production). Only one or two challenges focus on macro and even then they only focus on the opening few minutes of the game. As such the challenges will not teach you the skills required for constant production in the later stages of games.

I recommend trying to get a silver rating in most of the matches, particularly Rush defence and Opening Gambit. You can always come back and polish your skills by going for golds later on.


Watching Games/Replays

At any stage in your Starcraft 2 career watching casts of matches or replays is an excellent way to improve. Usually you are looking for new strategies, tricks, and other specific things. However, when you are just beginning the goal of watching games and replays is not to give you specific insight or even strategies, but rather to give you an idea of what the game is about.

So try not to pay too close attention to all the specific details of the games you watch. Focus instead on the broad strokes of play and the general way that matches play out. For example, if you notice that one player decides to build a second base really early take note of how that impacts the game. “Oh, he built a second base really quickly and almost died there for a while but later on he had a heaps bigger army”. Those are the types of things you want to take notice of because it gives you a fundamental understanding of the game to build upon. As such watching games and replays is the best thing you can do early on to improve your understanding of the game.

Want to know where to get videos of games or replays to download? Head to my Learning Resources section.


Playing in the Practice League

I am going to come right out and say that I do not recommend the practice league for preparing for multiplayer Starcraft 2. Practice league is designed as a way to ease very new players into the game with it’s lower speed setting and destructible rocks to prevent early attacks. I would only recommend this to players who have never played against a human before and are having severe confidence issues or to people who are looking for a super casual playing experience.

Unfortunately for the vast majority of players the design of the practice league creates bad habits such as not defending early on in the game or being too passive. The lower speed setting I feel just makes the real thing seem much more hectic once you do move on. I played a few (maybe ten) practice league matches and I would have preferred that I had just skipped it entirely, it has taken me a long time to break away from the passiveness of those games.


Preparing Mentally

Bronze league is nothing to be ashamed of!

All of the above things will help to prepare you mentally for online play and will help you feel more confident. But you should remember that it’s not your goal to go in and win a heap of matches because you are super prepared. The point of the above preparation is only to give you an appreciation of the game and an understanding of why you will lose most of your matches. Thats right, it is very likely that you will lose a lot of matches when you begin, particularly your placement matches.

Hopefully all of your preparation and understanding of the game will allow you to see this as a challenge to overcome rather than a deterrence to playing again. I get the feeling that those initial losses are a big deciding factor in whether new players come back for more. Hopefully by being better prepared this hurdle can be overcome.


Do you know anyone who is about to start playing online or has lost a heap of matches early on and has lost interest? If so share this article with them and hopefully we can get more people playing and loving SC2.


Protoss Scouting and Detection

In this article I will look at the options that Protoss has for scouting and detection and the challenges and advantages those options present. I will talk about what I have found to be effective and how I am dealing with problems I have been having with detection.

Every race in Starcraft 2 has its own unique methods of scouting and detecting cloaked units. This presents a challenge for new players, as there are multiple options available to you and the best one to use is often not so clear. Protoss has a few obvious and a few not so obvious ways of scouting. Much of these are simply personal preference but some are more effective in certain match ups than others. Detection, however, is a bit more strict in its use, specifically Photon Cannon placement. Below is what I have learned to be the effective ways to scout as Protoss as well as the best ways to use your detection options.


Scouting With Your 9 Supply Probe

Use that scout and count those drones.

The ‘standard’ time for Protoss to scout with their probe is at 9/10 supply. Typically, this probe warps in your first Pylon and then heads off to the opponents base. For ease of scouting I set this probe to a control group right at the start of the game (control group ‘0’ is my scouting control group). What this Probe is looking for is the key. First off he wants to eliminate the possibility of your opponent doing a ‘cheesy’ or all-in build. Signs of these types of early builds include:

  • Vs. Zerg – Very few Drones and a Spawning pool indicates a ‘6 pool’ Zergling rush or similar.
  • Vs. Terran – 2 Barracks and no Refinery indicates a possible ‘2 Rax’ Marine rush.
  • Vs. Protoss – 2 Warpgates, no Cybernetics Core indicates a ‘2 Gate’ Zealot rush.
  • Vs. Protoss – Empty Protoss base, or only a Pylon and Forge indicates a Cannon rush or Proxy gateways. Go scout in and around your base!

The second objective of that Probe is to identify what your opponent might be planning. There are many small things that you might see that can indicate what your opponent’s plans might be and there is an excellent list of these things on the Team Liquid forums here. Please check them out. While this scouting is important do not let it maintain all of your focus. There is nothing worse than knowing exactly what your opponent is doing but not being able to do anything about it because you have been to busy scouting too build anything.


Protoss Scouting Options

Scouting options for Protoss begin limited, just Probes, Zealots and then Stalkers, but as your tech level increases those options increase exponentially. I will simply list the options that I have heard of/discovered, if you know of any more please let everyone know in the comments section!

Hallucination

Hallucinate is available from the Cybernetics Core and you can begin research on it as soon as your Warpgate Tech is finished. Hallucinate allows you to use a Sentry to create a hallucinated unit of your choice. And your choice will almost certainly be to hallucinate a Phoenix to scout your opponents base. There are two nice things about this tech: firstly, if you are not planning on getting air units a few hallucinated air units can force your opponent to build unnecessary air defences. Secondly, you can use this to scout throughout the game without any further financial cost. Note: Do not attack with the Hallucinated units, they don’t do any damage and your opponent will know that it’s a fake!

Observers

Observers are almost a necessity later in the game, and can be a very effective way to scout before then. Often Protoss will settle for just getting one Observer to scout the opponents base/keep an eye out for cloaked units. Observers are cheap, quick to produce and are cloaked. So get lots of them, you can have one at your opponents front, one at each edge of their bases to watch for drops/air unit harass and one checking for your opponents expansions. With the vision provided by your observers and by having units on Xel Naga watchtowers you will be able to instantly shut down any harass or drops before they do any damage.

Phoenix

Dark Templar can do more than just kill workers.

Phoenix are quick to produce, are one of the fastest moving units in the game, have good harassment capabilities (especially against Zerg) and can provide excellent air superiority. With a few Phoenix it is possible to scout and harass your opponent at the same time. A drawback of using Phoenix for scouting is that their costs will weaken your ground army production by a decent amount. By using them to harass your opponent you can negate this somewhat.

Dark Templar

In a similar fashion to Phoenix, Dark Templar (DT) can harass and scout at the same time. Since they are cloaked, your DTs can just wander into an opponents base and scout before popping over to their mineral line for harassment. DTs usefulness for scouting your opponents base is limited if your opponent is prepared with detection. They can still be extremely useful for watching your opponents front and delaying enemy troop movements (as your opponent cannot move out without first getting mobile detection).


My Scouting Experiences

I have had personal success with using lots of observers, particularly against Terran. I find that I am able to shut down drops much better and can keep Terran contained much more effectively with the mobile vision provided by the Observer. Keeping Terran contained provides me with the extra confidence I need to dominate this matchup. PvT is currently my best matchup as Protoss, and I believe it is due to having excellent vision at all times. When I lose that vision is usually when I lose.

Against Protoss opponents I often use Dark Templar to scout, contain and harass and I have had decent success with this approach. I have found that it is necessary to also get Observers in PvP due to the increasing amount of players that seem to be using Warp Prism harass. I feel that PvP is currently my worst matchup and I need to work on maintaining good vision to overcome this hurdle. I may experiment with using Hallucination in this matchup.

I typically use DTs and Observers against Zerg, but I have had success with the Phoenix approach in the past. Zerg can, however, react very quickly to DTs if they are at Lair tech (if not DTs will be the end of them). As such I think I may lean more towards Phoenix in the PvZ matchup in the future.


Photon Cannons

Tucking a Cannon into the minerals like this will help those probes feel safe.

Its good practice to put at least 1 Photon Cannon in each of your mineral patches. This is mainly for the detection they provide but they also act as a deterrent for any light harassment. For as long as your army is fairly close to your bases this will be pretty much all you need. Once you expand more or start to move your army out it is always a good idea to put up extra cannon in the back of each base. This will effectively defend you from any harassment or counter attacks that may come.

I have had many, many games in the past where I have ended up trading bases with my opponent due to a counter attack drop in the back of my main base. I have also lost a lot of games due to cloaked Banshee harass. After I started putting up one Cannon in each of my mineral lines cloaked Banshees have not been a problem. However, I am still having trouble remembering to throw up those extra Cannon later in the game, and it has ended up costing me a few wins.


Do you have any other tips or strategies that you use to scout/detect with Protoss? If so, share them with me below!


Scouting With the Right Priorities

In this article I talk about scouting in the lower levels of Starcraft 2 and what your priorities with scouting should be.


I know i'm supposed to scout, but what am I looking for?

I know and i’m sure that you know that it is important to scout. You may even know specifically when you should scout, “Scout at 9/10 after building a Pylon”. I’m sure that sounds familiar. But the harder part to understand is why? The answer to that may seem simple, “To see what our opponent is doing”. But I have been noticing in my games that maybe that idea is causing all of my problems. I don’t really know what indicators of my opponents strategy i’m looking for when I scout, so I usually try to see exactly what they are doing. It can be pretty scary when you don’t know what your opponent is doing so it’s natural to feel like you want to watch their actions as much as possible. But you cant always have vision of your opponent, and on top of that you cant spend all of your time looking at your opponents base. We have to be building things, upgrading, expanding and building workers!

In the upper levels (the Pros) players are familiar with all of the possible things that their opponent could be doing in that particular matchup. They narrow down the possibilities based on what indicators they see until they know exactly what their opponent is doing. For example, DIMAGA recently played a game against MouzNaama, DIMAGA saw one indicator from his opponent, a Hellion. From this he was able to narrow down Naama’s plan to: A tank marine push, probably with Thors. See Day[9] Daily #254 for a cast/analysis of this game.

You will want to move towards learning all of the possible strategies for the match ups you play as you improve in league and skill. However, at the lower levels this seems to not be so important. Strategies are rarely executed cleanly and the indicators that the pros use will not really apply. Put simply, the lower leagues are super unpredictable and you will see all kinds of wacky strategies.

Because of the unpredictability of the games I see and because I couldn’t spend all day looking at my opponents base I settled for just checking if my opponent was doing something funky and then trying to see when he was going to attack. But with this approach I was never ahead of my opponent, I would just do what I was doing, hoping that it was right.

More recently I have been thinking:

“What if it’s not important to see what our opponents are doing, but rather, to see what they are not doing?”

Once I had this thought I started trying to use anything I saw to tell me what my opponent was not doing instead of trying to see exactly what my opponent was doing. I found that by noticing one thing, I could cross off another.

Some common examples I have been noticing include:

  • My opponents not getting gas early. That eliminates any tech options from their early game plans, they are either going to expand or rush with mineral only units. “I should stick around to see if they build a bunch of unit producing structures. They aren’t? Okay they are expanding, I should push or expand myself.”
  • I dont see an expansion early in the game. I can assume without seeing anything else that they are either building a large force to attack with or they are trying to race towards a particular tech. “I’d better build some units to defend with so I don’t die!”

Scouting in line with this thinking has greatly helped my early game knowledge of what my opponents are doing, and allows me to decide on an appropriate overall strategy. But after this the unpredictability of low-level play really prevents you from predicting your opponents plans with any great degree of accuracy. So how should we scout after this? I have come up with a list of your priorities in scouting that extend throughout the rest of the game.

These scouting priorities are:

  1. Finding out if or when an attack is coming. Your first priority is always to not die and knowing when the next attack is coming allows you to decide wether defences are necessary or whether you should expand.
  2. Maintaining map control. Map control is vital to your long-term prospects of winning and winning is your first priority after not dying. Vision helps give you map control as it allows you to detect you opponents troop movements and expansion attempts which you can then block.
  3. Intercepting harassment attempts. If you have map control your opponent will likely react with attempts at harassment with the aim of reducing your economic advantage or forcing you to pull your forces back. Having excellent vision will allow you to intercept any harassment attempts and prevent your opponent from taking map control from you.
  4. Finding out your opponents unit composition. Finding specifically what units your opponent has will allow you to build an attacking force that will be more effective against his.
  5. Seeing exactly what your opponent is doing. It’s easy to see why this is the least important function of scouting after listing the above. If you have map control and have denied any attempts at harassment, it doesn’t really matter what your opponent is doing inside his base because you have already won.

Scouting with these priorities in mind rather than trying to see exactly what my opponent was doing has given me a massive boost to my confidence in game. I realise now that wanting to see exactly what your opponent is doing is a natural response to the fear and uncertainty you have when you first start playing Starcraft 2. But it really is the wrong way to dispel that fear and uncertainty as it causes you to simply react to what your opponent is doing rather than taking control yourself.

After all, what makes you feel more confident? Reacting to what your opponent is doing or taking control yourself?


Starcraft 2 Economics

In this article I look at the four most important economic principles in Starcraft 2 and their place in the lower levels of play. Having a good knowledge of these concepts will help deepen your understanding of the game to the benefit of your play as well your appreciation of top-level players.

Strategy and economics go hand-in-hand in Starcraft 2. For those of you who are unfamiliar with economics; economics is not just related to money but also to production and consumption. These things are the basis of some of the most important concepts in SC2. These concepts are: spending all of your resources, the idea of constant production, the relationship between tech and army size and the idea of expanding. In this article I will introduce you to these concepts and explain why they are so important.


Spend!

Dual forges can help you spend that extra money.

There is this feeling that carries over from other games or perhaps even from life where we think that having a lot of resources is a good thing. One of the first things to do in Starcraft 2 is to destroy this notion. Your resources are not points! If you lose a match with 2000 minerals in the bank you should immediately know why. To further clarify, 400 Minerals is too much, 500 and you should start to panic!

Having trouble spending your minerals? Make sure you are:

  • Building workers.
  • Building army.
  • Expanding.
  • Researching upgrades.
  • Putting pressure on your opponent.
  • Building more unit producing structures.
  • Building static defences.
  • Not getting supply blocked (Build pylons/depots/overlords early and often).

If you get to the bottom of the list and still have resources, great! Now repeat those same steps.


The Idea of Constant Production

This is the first and probably the most important economic concept in Starcraft 2, and probably in other real time strategy games. You should be constantly producing both workers (SCV’s, Probes & Drones) and army units non-stop, back-to-back for the entire game. Constant production will help you both spend all of your money and get more (to spend).

Workers

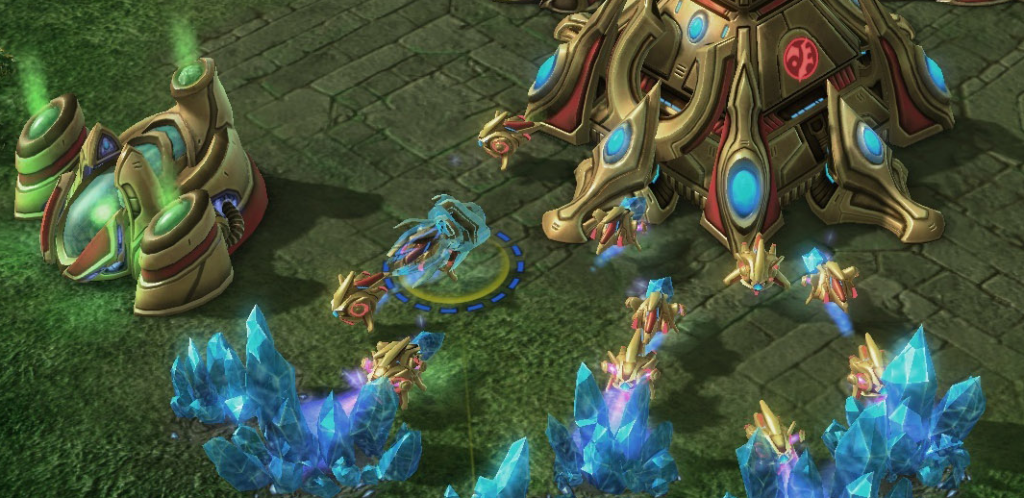
From the very beginning of the match you should be constantly building workers. The optimum (saturation) amount of workers for one mineral patch is 3 per mineral patch and 3 per gas geyser. Thats about 36 workers in total. But don’t stop there, keep producing those workers. Once you have an expansion every additional worker you have produced (and probably a few more for greater efficiency) can be transferred over to begin mining immediately, giving your income a boost right away. Eventually there is a point where you will want to cut worker production, generally you will learn this point when you will get killed because your army is too small. I have found this point to be anything greater than 90 workers, on three active bases. Any more than that and I have found that my economy is much greater than what I can spend and that my army is too small.

Army

Unlike worker production you will almost never want to cut production of your army. If a unit producing structure is not currently doing anything then it is a waste of resources. You should train yourself to cringe whenever you notice that you are not building units from a building, I know I do whenever I watch my replays. In my article on ‘Getting Used to the Keyboard‘ I wrote about the idea of producing units whilst in battle and the advantage it can give you. If you can manage to do this without any pause you will find that you will be able to reinforce your army enough to overcome most opponents regardless of how well they control their army. Zerg players are known for doing something called a ‘300 food push’ where they are able to rebuild their army almost as quickly as it is destroyed.

Focusing on constant production alone can improve your play more than anything else can. It should always be in your mind and you should even play matches where your main focus is simply to produce non-stop. If you are having trouble maintaining constant production then I highly recommend you check out Day[9]’s Daily #132 where he talks about ‘The Mental Checklist’. Remember not to be too hard on yourself, even the pros miss a worker sometimes.

Note: Don’t queue up units, those queued up units cost resources that could be spent on other things. If you have the money to queue then build another production building and build from it.


The Idea of Expanding

It takes a while for an expansion to become valuable, at the moment this one is still a 400 mineral loss.

Generally speaking, expanding is a good decision as it effectively doubles (for each expansion) your unit production ability. If you were able to build constantly out of four unit producing structures on one base you will be able to do the same with eight on two bases. Each expansion also adds two more Vespene geysers that can be used to build a higher tech army. However, there is one additional thing to note.

An Expansion is a Long-Term Investment

An expansion costs a decent chunk of minerals, and those minerals could have been used to add more units to your army. So if you spend those minerals on an expansion you must be prepared to wait for the return on your investment. It is a good idea to expand when you are being aggressive, but if you were planning on trying to kill your opponent with your attack those minerals would have been better spent bolstering your force. So have a plan before you begin. Do you want to put all of resources into one powerful attack to crush your opponent? Or do you want to expand and play a longer game with the intention of out producing and strangling your opponent? It is very important to make this decision and not to sit somewhere in between.

I will cover the topic of expanding in a future article as knowing when, where and how to expand is difficult to learn and requires a detailed discussion.


Tech vs. Army Size

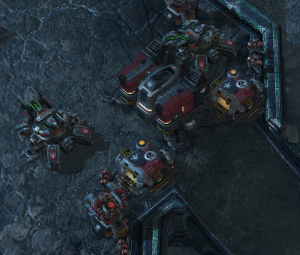
A small high-tech Protoss army faces an overwhelming low-tech Terran army.

How you spend your resources is almost as important as how quickly you spend them. It’s important to know that there is a direct relationship between level of tech and initial army size. In the beginning of each match you have only limited resources, specifically, 2 Vespene geysers available to you. This creates a a situation where you must make a decision to either have a larger army or a technologically superior one. Generally, a larger army is better than a smaller one, but higher tech gives you more options. With a higher tech army your objective will be to take advantage of your opponents weaknesses (such as exploiting your opponents lack of detection to harass with cloaked units) in order to buy yourself time to create a larger, more effective army.

How This Changes in the Late Game

As you move towards max supply you should begin to favour more expensive, higher tech units instead of the basic units. This will ensure that your maxed army is efficient, that is, more durable and useful. Day[9] discusses this concept in great detail in his Daily #249. It is important to realise the difference between the early stages of the game where you make the decision between a large army or a high tech one, and the late stages of the game where you almost certainly need to be favouring higher tech units.

My experience is that at the lower levels army size wins out over a teching opponent more often than not. Prior to writing this article I played approximately ten matches in which I built mainly Stalkers and Zealots in mass quantities whilst expanding and investing in upgrades. I won 80% of those matches, which is unusual because my win/loss ratio is usually around 55%. I am going to continue to test this method and I may end up writing an article on my findings.


Spending all of my resources and constant production are two things which I am struggling with. I always seem to end up with over 2000 minerals! But practicing Day[9]’s ‘Mental Checklist’ is seeing me steadily improve.

Which of these topics do you have the most trouble with? What have you done to improve?


Thanks to FaDeMeatex and the rest of SEA BattleNet for their input into this and other articles. Feedback is always appreciated.


Getting Used to the Keyboard in Starcraft 2

In this beginners Starcraft 2 article I discuss how I learned to use the keyboard effectively for hotkeys, control groups and queuing commands.


Starcraft 2 is Played With Two Hands

The function and control of the mouse in Starcraft 2 is natural and easy to pickup for new players. In fact the entire game can be played with just the mouse hand. However, to do so limits your options and efficiency in the game severely. How so? The keyboard allows you to look at one thing and do another. Let me illustrate this with an example; your troops are currently engaging the enemy, whilst watching the battle using only your keyboard hand you can: build SCV’s/Probes/Drones, build reinforcements for your army, research upgrades. Lets suppose that this battle ended with both teams losing equal amount of troops, who would be ahead? Well, the person using their keyboard to do all of those things of course!

Learning to use the keyboard effectively is essential to becoming an efficient player.

You will also find that the keyboard has other useful functions such as finding idle workers, queuing commands and using abilities. Ok so I have sold you on why you should be using the keyboard. But getting comfortable with using it can be very difficult for newer players, I myself have had a lot of difficulty with this in the past. But with some thought and good practice techniques you will be comfortable with using the keyboard in no time.


Learning Build Command Hotkeys

This is the starting point for learning to use the keyboard as it is the most simple and easy to learn. Build command hotkeys are letter keys which represent one of the options in the bottom right corner of the screen for the building of units and structures. If you mouse over one of these buttons take note of the keyboard letter that represents that button. It is good practice to learn all of these hotkeys even if it is for something you only use once a game.

Never click build commands, always use their hotkeys.

Why is it Important to Do This?

Once you learn a hotkey something interesting happens, you no longer have to think about it. This is because of the way muscle memory works, your fingers remember what to press and your mind is free to think of more important things, like what your next move is.

What is the Best Way to Learn This?

Day[9] describes a method in his Daily #132 which I have used with great success. It is a really simple and a very effective way to train your fingers and develop that muscle memory. Basically, every time you do not know a hotkey for something, mouse over it but do not click it. Instead, read which hotkey it is, move you mouse back to the centre of the screen and press the hotkey. Using this very simple method you will find your fingers will quickly learn which button to press and you will start doing it without thinking. Be sure to do this every time you do not know a hotkey.


Learning Unit Hotkeys

Unit hotkeys are very similar to build command hotkeys in that they each represent a button in the bottom right corner of the screen. These hotkeys include unit abilities and unit commands such as stop, hold and attack. Being able to execute these commands quickly is vital to effectively controlling your units.

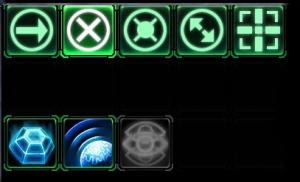
Unit commands (Top) and Abilities (Bottom)

Why is it Important To Do This?

Battles in Starcraft 2 happen very quickly, in the one or two seconds it takes you to move your mouse, select an ability and move your mouse back to the screen, much of your forces could already be dead. Learning hotkeys allows you to keep looking at the action and use abilities or issue commands much more quickly.

What is the Best Way to Learn This?

For ability hotkeys the same technique as above works quite well, although I suggest doing this in practice matches. However, there is no trick to learning the unit command hotkeys like attack, hold and stop. Only by practicing these can you commit them to muscle memory. Thankfully, there is not many to learn, and once you are familiar with them you will start to learn what you can do with them. But we will save that for another article.


Note: For both Build Command Hotkeys and Unit Hotkeys it is worth mentioning that you should trial using both the ‘Standard’ layout and the ‘Grid’ layout. It is mainly a matter of comfort but ‘Grid’ layout is generally considered to be the more efficient layout. Essentially ‘Grid’ layout moves all hotkeys over to the left side of the keyboard, where every key represents a physical space within the unit/building control panel. If neither layout feels comfortable SC2 supports custom hotkeys (as of patch 1.2). – Thankyou to FaDeMeatex for pointing this out!


Getting Familiar With Control Groups

Control groups are units or structures that are bound to your numerical keys (1 through to 0), once bound pressing the corresponding number key will select those units or structures. You first create a control group by selecting a unit, structure or group, holding the Control key and then pressing the number key you wish to bind them to. Once a control group is created you can add any unit or structure to that group by selecting it, holding the Shift key and pressing that same number.

Control groups are easy to learn but difficult to master.

Why are Control Groups Important?

Control groups allow you to select a unit or structure without first moving your screen to it. They also allow you (by tapping the control group twice) to quickly jump the screen to any bound unit or structure. Say your main force is bound to control group 1, and reinforcements are bound to control group 2. Your main force engages the enemy and you wish to bring your reinforcements to support them. You can do so without moving the screen, simply press “2” and tell them to move to your main army. Control groups also allow you to build units from structures without moving the screen by simply pressing its control group number and pressing the units hotkey. You can then even rally your troops to wherever you want!

What is the Best Way to Learn to use Control Groups?

I will not discuss particular control group setups because it is important that you play around with different setups and see which one suits you best. I am constantly changing and refining my control group setup and I have a different setup for each race.

A good start is to define before a game what control groups you will use, and make sure you at least plan to use all ten numerical keys, even if you don’t end up using them. You may say something like “I will try to use keys 1 to 3 for my army units, 4,5 and 6 as my Nexus/Command Centres/Hatcheries, 7,8 and 9 as tech structures and 0 as my scout.” Now this particular setup may be good or bad, but as long as you use all of the control groups you can refine your setup later.

A forgotten unit is wasted resources.

The next step is to try to add each new unit to you’re existing hotkeys as you make it. This will do two things: get you more and more familiar with your setup and ensure that you do not forget or miss any unit. A forgotten unit is wasted resources. You will constantly change and refine your setup, and you may wish to try what other people use but just remember there is no right or wrong setup, only what works for you.


Queuing Commands

I chose to make this separate as I feel that it is something that is underused by newer players. This could be because it is a little bit more complex or it could be simply that many do not know of it’s use. Simply you can queue up commands  for units by holding the shift key. Very simple premise but it allows you to do many things such as:

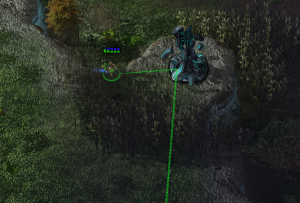
Queuing up commands lets you set a scouting route.

  • Tell a unit to take a specific route, such as setting up a scouting route so that you do not have to constantly tell the scout to change its destination. Simply right click first destination, hold shift then right click all subsequent destinations. You can even do it via the minimap!
  • Move to a location then attack. Useful for getting ranged units into range so that they all attack. Do this by right-clicking then holding shift, pressing “A” (attack) and left-click where you want them to attack.
  • Directing your units to kill things in a particular order. Useful for telling your units to focus on workers rather than structures or hostile units. Right-click unit to be attacked then hold shift and right-click each subsequent unit.
  • Telling units to move to a location then use an ability. Terran players might like to note that you can simply tell a tank to move to a location then hold shift and press “E” (siege), then it will siege up once it gets there. Also works well for Blink stalkers (making them all able to blink across a gap, see this video).


So start using your keyboard hand! Once you get comfortable with it you will wonder how you ever did without. I also think that it makes the game more fun to play and less strenuous on your mouse hand. Does anyone know of any useful keyboard features or tricks that I haven’t mentioned? If so please let everyone know in the comments section below!