Sunday, 27 of April of 2025

Tag » Unit Positioning

Protoss vs Protoss Anti 4 Gate
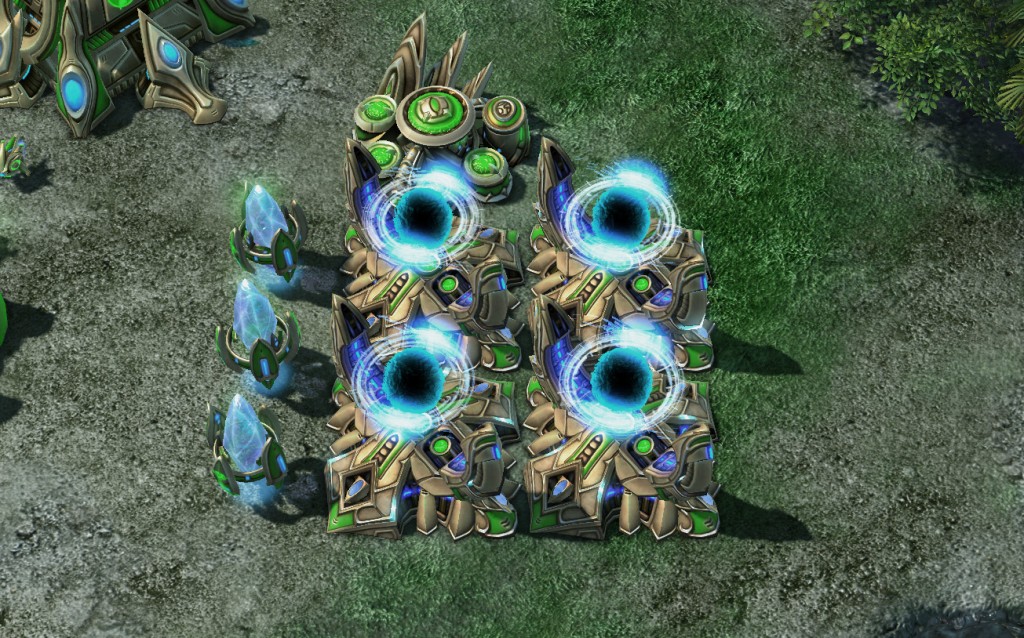
In this article we look at the 4 Gate in PvP, how to identify it, how to defend it and how to gain an advantage and transition.

Being a Protoss who wants a long PvP is a hard life. The Warpgate mechanics that make Protoss so unique and fun to play also makes for a very powerful timing attack – the Four Gate. The Four Gate gives a large flood of units early in the game and allows for an aggressive early game that can damage an opponent greatly or kill them outright. It is relatively simple to execute (although difficult to perfect) making it very popular and very hard to deal with, especially for newer players.

In fact the Four Gate can become a nightmare for some players making them dread the PvP matchup which is a shame as there is a lot of fun to be had in the Protoss vs Protoss late game. In this article I will go through how to identify a Four Gate, how to stop it and how to transition after the attack has been defended.


Scouting the Four Gate

Scouting is the most important part of beating a Four Gating player. Effective scouting will allow you to identify that they are Four Gating, gauge the type of Four Gate they are doing and kill the proxy Pylon and Probe.

Signs of a typical Four Gate:

  • Nexus has high energy – After two Chrono Boosts are spent on Probes the Four Gating player will save up energy to Chrono Boost the Warpgate Research. This is true for all all Four Gates as the faster the research finishes the stronger the attack will be.
  • Missing Pylons – Count the number of Pylons in your base then count his. Is one of his missing? It is likely hidden somewhere near your base so that your opponent can Warp units in. Although this is a common sign of a Four Gate it could also be an indicator of a hidden tech build such as Stargate or DTs.
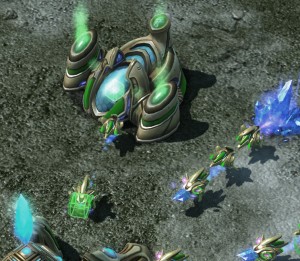
  • Stalker and Probe (and possibly a Zealot) moving out together – This is the best but latest indicator of an incoming Four Gate. The opponent will move towards your base with these units and then build a Pylon to reinforce his attack.

Signs of a ‘Korean Four Gate’ (Pure Zealot):

  • Your opponent has removed Probes from the Assimilator – He has mined enough gas for Warpgate Research and then has stopped in order to get as many minerals as possible. As soon as you see this indicator be on the lookout for the next one.
  • Pylons in your base – This one is kind of obvious but sometimes it can be mistaken for a Cannon Rush. The opponent will put 4-6 Pylons in your base in areas that are hard to deal with.

Indicators of the type of Four Gate:

  • Gateway is down much earlier than yours – Assuming you have built your Gateway on 12 or 13 supply this means that your opponent has likely put their Gateway down on 10 supply. This Four Gate Variant hits earlier but is much less economic to the point fo being almost ‘All-in’. 
  • Two Assimilators – This is uncommon in PvP, however, if you have scouted that it is definitely a Four Gate then this means that your opponent will be building a lot of Sentries or plans on transitioning into a tech build. In this case the Four Gate may be defensive and an attack will not come.

There are two sides to scouting in PvP. Firstly, identifying the Four Gate, and, secondly, map control to spot Probes and Pylons.

Initially you want to look for the above indicators by sending a Probe to your opponents base on 9 or 13 supply. Sending the Probe on 9 is safer but is less economic then sending it on 13. Poke around their base for as long as possible to get as much information as possible. Once they start building their first Stalker it’s a good idea to pull your Probe back.

Once you have identified that the Four Gate is incoming its important to begin having as much map vision and control as possible. Check around your natural expansion with your Zealot and send you Stalker to scout around the map and to check the opponents front. Try to hold the Xel Naga towers as much as possible as this will help you spot the Probe on its way to build a Pylon. If you can spot that and kill it you will gain a huge advantage. Hold map control and the Xel Nagas until the very moment your opponent moves out then give up map control and head back to your base to prepare.


Stopping the Four Gate 

The following is assuming you are defending with 3 Gateways or a defensive 4 Gate. The following will also work with an Immortal-based defence except you will be unlikely to have as much early map control. Other builds that are specifically designed to defeat a 4 Gate will have their own methods but more often than not they will revolve around the same principles.

Before 5:50

Being active with your initial units is crucial. Send your Zealot to check for proxy Pylons near your Natural and send your first Stalker to check the Xel Naga towers and try and intercept any Probes.

If you encounter any of his units converge all of yours and try to kill them, even doing a small amount of damage will help you a lot. Be cautious not to lose anything yourself, if he outnumbers you (particularly in Stalkers) give up map control and pull back to your ramp.

If you are planning on defending with Immortals you will likely have more Zealots than Stalkers and your map control will be limited at this point, keep your Zealots near your ramp.
After spotting the Probe follow it and deny the Pylon
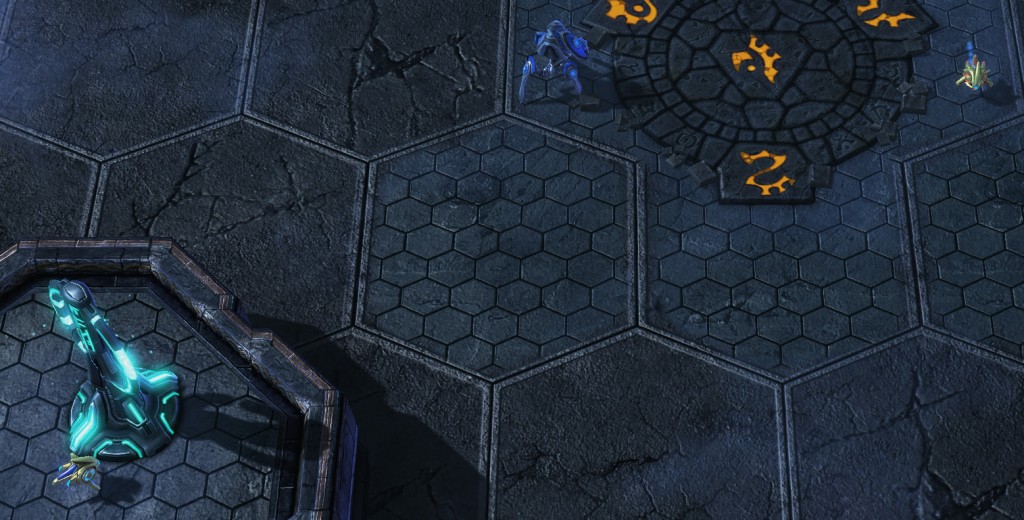
Holding the Xel Naga will often help you spot the Probe heading to Proxy.


After 5:50

Once you have pulled back to your ramp arrange your units in an arc at the top. Make sure you position some Stalkers to prevent Pylons from being warped in. I find it extremely helpful to put all of my units on ‘Hold’ as this prevents them from being baited down the ramp and allows you to focus on macro and Force Fields. 

It is extremely important to always have a Force Field available to block your ramp. If your Sentry is low on energy always preference warping in another Sentry over a Stalker. Six Sentries are able to Force Field a ramp perpetually but it is unlikely that you will get to this point defending a 4 Gate.

If you can split his units as they try to move up the ramp and kill one or two Stalkers each time you will get ahead on Stalker count very quickly. This puts you in an excellent position if he pulls back. If he continues to try to win with the 4 Gate you can just keep Force Fielding and gaining small advantages.
Units on Hold at the top of the ramp.
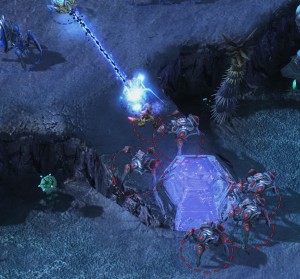
Cutting a small amount of units with the FF maximizes your defenders advantage.


Transitioning with an Advantage

 After defending a 4 Gate you should have at least one of the following advantages:

  • Economy/Probe advantage,
  • Gas/Technology advantage,
  • Unit advantage.

Keep in mind whilst defending how you can work towards these advantages. For example, in a defensive 4 Gate situation you should be aiming for a slight Probe advantage by building a few as you defend. You should also be trying to get the Unit advantage by cutting his army on the ramp while not losing too many of your own units.

In a defensive 3 Gate situation you should be getting as much gas as possible and maximizing your Stalker count while remaining safe with as few Sentries as possible. The extra gas you have collected can then be used to transition to Blink Stalkers, a Robotics Bay or a Starport.

Other openings will have one of the above advantages as its main goal. It is important that you identify this and think about how you can work towards that goal. 

In the Protoss vs Protoss early game you will have to be comfortable gaining and keeping a very small advantage. Having a few extra Probes or a bit of extra Gas will secure you a long-term victory but it can be easy to lose that advantage if you try to move too quickly. Holding a small advantage is more important then gaining a large advantage or even getting a quick kill.


Things to Note

No matter which build you are using the smooth execution of your opening will play a big role in your success. Early supply blocks will result in a loss when facing a 4 Gate (or any rush for that matter). As such, it is important that you practice your opening against the AI or a friend until you can do it without any errors. Remember, it will be a lot harder to perform a flawless opening when you are being attacked.

If you Chronoboost your Gateways instead of Waprgate research you will have an easier time gaining early map control and denying Proxy Pylons. Unless you are defensive 4 Gating it is a good idea to do this.

Denying the first Pylon can set the opponent back by 10-20 seconds and one Zealots worth of Minerals. It may be worth sacrificing your initial Zealot to do this.


Additional Resources 

  • Replay – A replay of a ‘Textbook’ 4 Gate defence showcasing some of the ideas in this article.

  • Build – Safe PvP 3 Gate build.

  • Opening – Triple Stalker rush. This opening is built around the idea of gaining early map control to deny the 4 Gate.


Have you had a lot of trouble with the 4 Gate in PvP? If you have any tips or advice to add or if you found this article helpful please leave a comment!

Effective Harassment

In this article I look at what makes harassment effective and some of the traps to avoid when trying to harass.

Harassment is very exciting to watch in professional matches and can be great fun to emulate. Harassment is usually done to gain some sort of advantage through economic damage, disruption of production or by throwing off your opponent. While it seems like harassment would always be good sometimes you will do what seems like a lot of damage and still lose. There are a few things going on below the surface when top-tier players harass and there are some pitfalls to be aware of if you want your harassment to be effective.


Guaranteed Damage

The concept of guaranteed damage is important in harassment and even in normal attacks. You have probably noticed that when people harass they will try and kill workers, Pylons, Supply Depots or Overlords. The reasoning behind this seems kind of obvious, kill your opponents workers and they will be getting less income, kill their supply and they will become supply blocked. However, there is another level of reasoning at work here, guaranteed damage.

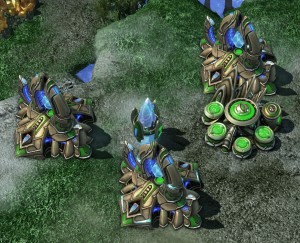
This Pylon is known as a 'critical Pylon' and it is a high priority target as it powers four structures.

Guaranteed damage simply means that you will be able to kill what you are trying to kill. If, for example, you drop a Medivac full or Marines in your Protoss opponents base you have a few choices and it may be tempting to go for the one with the biggest reward – the Nexus. However, it may take 30 seconds to kill the Nexus and in that time your units could be killed or repelled, leaving you with no damage done. If, you instead went for Probes or Pylons, which have much less health and are easier to kill, you will be almost guaranteed to do some damage before your opponent can defend.

It is essentially a question of risk vs reward, and you are always much safer going for an easier to obtain but smaller advantage then going for an unlikely to obtain but larger advantage. The following are a few examples of things to target when harassing with the concept of guaranteed damage in mind:

Vs. Protoss

  • Probes – Economic damage and easy to kill.
  • Pylons – Disrupts production by un-powering structures and affects supply cap. Single Pylons powering multiple buildings are high-priority targets.

Workers mining gas are a good target as killing them can delay your opponents tech and some people will forget to replace them.

Vs. Terran
  • SCVs – Economic damage, easy to kill and can not regenerate between multiple attacks.
  • Mules – The same as SCVs but are higher priority due to the amount of minerals they harvest.
  • Supply Depots – Affects supply, and relatively easy to kill.
  • Tech Labs and Reactors – Have low health and killing them slows production or prevents higher tech units from being produced.

Vs. Zerg

  • Drones – Economic damage and easy to kill.
  • Overlords – Affects supply, easy to kill before speed upgrade and can often be found outside the bases of carless Zergs.
  • Queens – Slow if caught off Creep, relatively easy to kill and slows down unit production greatly due to missed Larva Injects.
You may have noticed that there is a way to affect the income, supply and production of each race. It is up to you to recognise which is the most important in each game. Do you need to delay an attack by affecting supply or production? Or do you need to gain an economic advantage for a late-game win?


Two Places at Once 

When harassing your opponent you never want to only attack one spot at a time. It is much easier for your opponent to defend, you are more likely to lose your units without doing any damage. A good example is sending a Medivac full of Hellions to attack your opponents main base. It is very easy for your opponent to pull back their army and kill off your attack before you have a chance to do any damage. If in that same scenario you sent Two Medivacs, one to the main and the other to the opponents third base your opponent may be able to easily defend one (simply retreat the attack that he tries to defend) but the other will go undefended. If instead your opponent splits his army and defends both Hellion drops they will be weak to a frontal assault. If they do neither then they will lose a lot of economy.

Another excellent way to incorporate multi-pronged harassments is to harass while attacking with you main army. While preoccupied with your frontal assault your harassment will likely go unnoticed and will cause a lot of damage. You can then simply retreat your main army and your harassment having doen the damage needed to secure a long-term victory.

Always be on the lookout for ways to spread your opponents resources thin, multi-pronged harassment will achieve this even if it does not actually do any damage. The threat of harassment can often be enough to secure you an advantage.

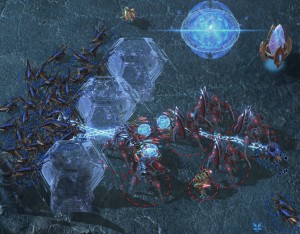
Frame by Frame example of a two pronged attack.

In the first frame the main army prepares to attack the opponents front while a Warp Prism full of Zealots prepares to drop at the east. In frame 2 the main army engages and the Warp Prism unloads in the mineral line. Having done the damage required to secure victory, the main army retreats in frame 3 to avoid unnecessary losses. Unfortunately the Warp Prism is destroyed preventing the Zealots from escaping but it was a worthwhile trade.


Takes the Opponents Focus

Good harassment will cause your opponent to make mistakes, to let their units get out position and to forget key parts of their build. The threat of harassment, like a Warp Prism sitting just outside their base can stress your opponent out or cause them to make more static defences then they would otherwise like to.


Doesn’t Put You Behind – Micro vs Macro

If your harassment taxes your own attention too much you will macro poorly and may even end up in a worse position than your opponent. Some harassment tactics require more micromanagement than others. Banshee harass and High Templar drops, for example, require a lot of attention and unless you are able to continue macro-ing whilst doing them they should be avoided by beginners. 

However, there is no reason to not apply the same tactics to simpler harassment tactics. For example, attacking the front with your main army while running a few units to an unguarded expansion can be very effective in lower leagues. 


Don’t Force it

The worst thing you can do is to overcommit to harassment. Don’t make harassment your main objective, and if your opponent is able to easily defend themselves then don’t try and force it. Each failed harassment attempt weakens your main army and makes you susceptible to a straight up attack. Incorporate harassment into your normal play while being aware of the above things and you will see a lot of success.


Have you had much success with harassment? Sometimes harassment tactics can seem very powerful and can win you games outright. But then there are other times when you appear to do a lot of damage but actually fall behind. Hopefully this article helps you understand some of the less-known aspects of the popular tactics.


Using Force Fields Effectively

In this article we look at possibly the most valuable tool in the Protoss' arsenal: the Force Field!

The Sentry’s Force Field ability is probably one of the most important tools Protoss has. It can be used to defend when an early attack could not otherwise be defended or to assault your opponent while forcing their army into a bad position.

Games can hinge on good Force Fields, it’s not uncommon that an incorrectly placed Force Field will cost a Protoss player the game. It is crucial for your progression as a Protoss player to at least have a decent grasp on Force Field use.

In preparation for this article I looked at a lot of games from three professional players well known for their near-perfect Force Field use: White-Ra, iNcontrol and oGsMC. I have also been doing a lot of work on my own Force Field use, with great results.


How To Cast Force Field

Assuming ‘F’ is the hotkey for Force Field (F is the Default) the to best ways to cast it are:

  • ‘F’ > Click each Force Field individually, or,
  • Hold ‘F’ down and click for each Force Field you want to cast.

This is purely personal preference, I use the first option because I feel it makes me place each Force Field a little better than if I use the second option. Try both and decide which is more comfortable for you. Do not ‘Shift+F’ Force Fields as it causes the Sentries to cast after they kill the current unit that they are attacking.


How Many Sentries are Needed?

The following is based on my experience and my observations on professional Protoss players. I give a range of recommended Sentry counts so that you can adjust depending on how good your Force Field placement is. If you are not confident that you can be very efficient with your Force Fields use the higher Sentry count suggested.

  • When defending one base with a ramp 3-4 Sentries is enough to block the ramp for as long as you want.
  • When moving out to take an expansion a minimum of eight Sentries is recommended against Zerg. Eight will allow you to have enough Force Fields to easily defend any Zergling attacks and small Roach pushes for a good amount of time.
  • When moving out to attack or secure further expansions 8-10 Sentries is recommended to effectively apply the techniques discussed in this article. This is true in any matchup, especially when you are using Colossus in your army. Effective Force Fields will greatly amplify the effectiveness of Colossus.


Force Field Techniques

The Force Field ability is very versatile and its uses are only limited by your creativity. The following are common techniques that you can use to great effect.


Ramp Block

This is the most simple of the techniques and only requires a bit of timing to do well. Force Fields are used to block enemy forces from coming up (or going down) a ramp. You can place the Force Field to completely block enemy troops or you can attempt cut the army in half as it comes up the ramp netting you a few easy kills.

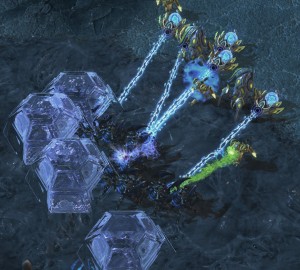
In this game WhiteRa used a Force Field to prevent enemy Zerglings from reinforcing an expansion.

In the same game WhiteRa uses a Force Field to trap a few Zerglings on a ramp. Easy kills.


Open Field Block

Used to prevent enemy forces from engaging with your army or to prevent flanks. This technique should be used when you want to completely avoid an engagement or if your troops outrange those of the enemies, a common thing for Protoss. You can improve the effectiveness of this technique by utilising chokes, walls or buildings to help block the enemy’s movement.

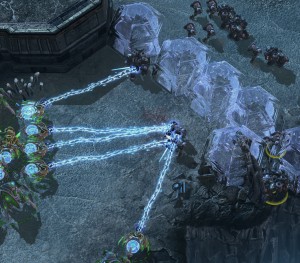
Zerglings can easily be blocked by using Force Fields in the choke created by the gateway

oGsMC blocks off the Roaches allowing his Stalkers and Colossus to attack freely.


Cut and Trap

Using Force Fields you can cut an enemy’s army in half and trap some of the units to be easily killed by your Zealots. Using this method you can safely chip away at the enemy’s forces whilst taking minimal damage yourself. You can also trap any units caught off guard by creating a concave of Force Fields behind the enemy’s units. I group these two techniques together because cutting an enemy’s army is the same as trapping a portion of it. Using these methods you will never have to engage the enemy at his full strength.

oGsMC uses Force Fields to trap a few roaches that are separated from the Zerg's main army.

In this game I manage to cut a few units off from my enemy's army giving me easy kills.


Bottleneck

A bottle neck is essentially a small choke, it restricts movement to your enemy’s army and causes them to bunch up into a gap. This technique works with splash damage from Colossus or Psi Storms and it also tempts all but the most experienced of players into engaging when they should be pulling back.

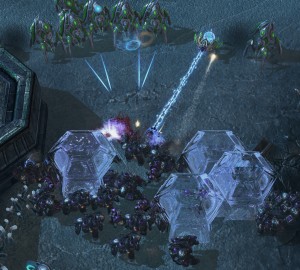
The bottleneck created here forces the Terran opponent to either pull back or fight a bad engagement.

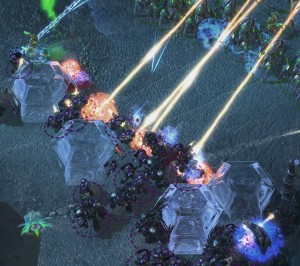
Here multiple bottlenecks have disrupt the enemy's arc and maximise the effectiveness of the Colossus.


A Few Tips

Following this advice can help you use your Sentry’s energy more efficiently and help you to have better engagements.

  • Troop Movement is extremely important: engaging at chokes or near walls will make your Force Fields much more effective.
  • As the enemy approaches throw down one or two Force Fields pre-emptively, then if he continues past those complete the cut. This makes cutting his army easier as it makes a temporary choke-point.
  • Try to not overlap your Force Fields, doing so wastes valuable energy that could be used on more Force Fields or Guardian Shield.
  • If you have High Templar in a control group casting Force Field becomes difficult, set your Sentries to a different control group to make using Force Field quicker and easier.
  • Calm Force Fields are well placed ones. Easier said then done. Try breathing out before you spam them everywhere.


When Force Fields DONT Work (Or, How To Deny the Protoss Force Field Use)

In the following situations Force Fields will hinder you or flat-out not work, avoid over producing Sentries if you encounter one of these.

Against Massive Units

Colossus, Thors, Ultralisks and Archons (as of patch 1.3.3) are all ‘Massive’ class units and will break Force Fields upon contact with them. If your opponent is leading their attack with these units do not Force Field, instead use your energy on Guardian Shield and Hallucinations.

Against Siege Tanks

Siege Tanks are generally stationary and have a long range, using Force Fields when facing a large number of tanks will help your opponent more than you. However, if you can, use Force Fields to prevent Terran’s units from pulling back into range of their tanks using the Cut or Trap techniques.

Against Air

Yep. Doesn’t work against air units.

When Your Opponent is Highly Mobile

This one is a little different. If your enemy is playing a highly mobile game (using fast units and drops or other harrasment) Force Fields become limited in their usefulness overall. You can still use a few Sentries to prevent some attacks but most mobile players will simply attack elsewhere. In this situation limit your Sentry production and instead focus on your own mobile units to counter or build up for an attack.


Has Force Field use been something you have struggled with or are you the oGsMC of your division? I am still having trouble with making sure that I don’t overlap them too much. Let me know about your Force Field skills in the comments below!

A special thank you to Ramzdale for helping me get a few of these awesome pics!


Sun Tzu on StarCraft 2

In this article I share some advice from Sun Tzu's "The Art of War" and discuss how it works in StarCraft 2.

Sun Tzu’s “The Art of War” has been read and interpreted throughout history by many different people for many different purposes. Occasionally, in between University, Work, Playing SC2 and writing about SC2 I find a little bit of time to read (on my lunch break at work if there are no new Dailies). Reading through one particular section of this book I couldn’t help but apply it’s lessons to SC2 because it was just so clearly relevant. In this particular section Sun Tzu states the best things a general can do in war in descending order.


“Thus the highest form of Generalship is to balk (destroy) the enemy’s plans.” – Sun Tzu

This is the moment when you cheer as Terran, an almost guaranteed victory!

To destroy your opponents plans is clearly the best thing you can do in Starcraft 2. Note that Sun Tzu says to destroy your enemies plans, not just to counter them. Generally, countering implies that you merely defend or survive – not really the best thing that you can do. But to destroy your opponent’s plans puts you in a dominating position in the match which is where you always want to be.

A good, but extreme example of destroying an opponent’s plans would be having your opponent’s 6-pool rush reach your base after you are completely walled in. Anyone who has been in this position will know that you are at a massive advantage at this point. You haven’t just countered your opponent’s plans, you have destroyed them. Even in less extreme examples having their plans destroyed will throw off all but the most experienced of players. It can be very hard to formulate a new plan mid-game, so take advantage of that.

You can achieve the destruction of your opponents plans in SC2 by scouting, covering your vulnerabilities (adequate detection, anti-air etc.), and by always being aware of what your opponent could do — this means having prior knowledge of the possibilities at any given point in the match. This type of knowledge comes with experience and research.


“The next best is to prevent the junction of the enemy’s forces.” – Sun Tzu

Pick off every undefended unit you can, this Probe is extra valuable because he is also holding a little gift of minerals.

If you fail to destroy your opponent’s plans or if your opponent plays straight up without any ‘tricks’ then this is your next best step. In war, cutting off your enemy’s supply lines or reinforcements would give you an obvious and great advantage. And it works much the same way in StarCraft 2. Simply, its all about not letting your opponent’s army reach its greatest potential strength.

You can achieve this by harassing your opponent, attacking and retreating (particularly against Zerg as it forces them to waste Larvae on defensive units) and by picking off all undefended units or structures. All of these things will weaken your opponents overall army strength as well as their resolve. Utilising highly mobile units (Blink Stalkers, Medivacs, Hellions, Speed Zerglings, Mutalisks etc.) is the key to succeeding in this style of indirect engagement.

This is the method I favour in most of my matches, I always attempt to destroy my opponents plans first but lack of experience often makes this difficult. Letting your opponent mass a powerful army without any intervention is nearly always a bad move, if you have ever had a maxed out Stalker/Colossus army bear down on you then you will know why. Suffering this too many times I have resolved to always pressure and do everything I can to reduce my opponents ability to mass an army.


“The next in order is to attack the enemy’s army in the field.” – Sun Tzu

Having Zealots flank an attacking army like this will deny their retreat whilst you cut through them.

If you allow your opponent to amass their forces unopposed, then a straight up engagement in open ground is your next best option. In this situation the winner will be the player: who has the best unit composition, who can micromanage their army better and who can best continue production to reinforce their army throughout the conflict.

Why should you ever let the situation get to the point where you and your opponent are in equal positions? It is always better to be in a dominant position in each match. However, your opponent will be making their own efforts to get an edge over you and it is sometimes unavoidable that you will need to enter a battle on (nearly) equal grounds.

In this situation there are a few things you could do to tip the scale in your favour;

  • Position your forces well just before the conflict ensues (such as creating an arc with your ranged units and moving your melee units to the front),
  • Send some units to flank and trap your opponents forces, and,
  • Take advantage of terrain such as high ground, choke points and visibility blocks (smoke or grass).

Using these tactics you can turn an equal situation into a one sided victory. For an excellent example on how to do this as Zerg against Terran see Benji’s Guide on How to Control Zerg Units.


“And the worst policy of all is to besiege walled cities.” – Sun Tzu

What if your opponent amasses their forces but does not leave their, well defended city? The most common reaction in this situation is to attack their base. In StarCraft 2 when your opponent is being completely defensive you should realise that you have the advantage. Attacking your opponent at their base where they have defences effectively hands that advantage over to your opponent.

Why attack this straight up? He isn't going anywhere anytime soon.

So instead, use the fact that your opponent is not putting pressure on you to secure a long-term victory. Attrition is the name of the game here, starve your opponent of resources and deny their attempts at expansions. At the same time you should expand yourself, improve your tech, research upgrades and create a formidable army. Whilst doing this probe for weaknesses in your opponents defences with gentle harassment, this will force them to plug those gaps with more defences — further weakening his army. Put pressure on your opponent but never feel like you need to break in and kill them, instead let them kill themselves with their passivity.

Eventually your opponent will have to move out, as they will have exhausted their resources and if they delay attacking any further they will become weaker and weaker. Usually this attack will come in the form of a ‘doom push’,  just remember that although this may be hard to deal with your opponent has no capacity to replenish their forces. So just whittle them down slowly or if they head straight for your main base you should simply fall in on theirs. Because of the amount of expansions you should have by this point and with your ability to restock your army you should have no trouble destroying their base first.

So don’t waste your army against a walled in opponent, if you have ever attacked a turtling Terran player with siege tanks and turrets ringing their base you will know how little you can achieve and how swiftly defeat can follow. Take the advantage when it is given to you and don’t give it away for nothing.


I recommend that anyone interested in strategy (that should be you!) should read Sun Tzu’s “The Art of War” for themselves. It’s one of those things that you read and then it becomes a part of your character, helping you in any area of your life where a strategic decision needs to be made. And its like $10 on Fishpond with free postage in Australia, so you have no reason not to. On that note I also recommend “Go Rin No Sho” (“The Five Rings”) by Miyamoto Musashi, it talks about mentally dominating your opponent and seizing any advantages you are given. It’s probably my favourite book in this genre.


At which of the above points do you have most of your wins? Do you scout well and destroy your enemy’s plans? Or do you engage in the field and win with superior tactics? Which one do you most commonly lose to? Comment below and let me know!