The Little Things You Can Do to Get an Edge in StarCraft 2
There are many things that players do to get an edge over their opponents in Starcraft 2. Individually these wont take you from bronze to gold, but when combined they can give you a decent advantage. Normally, you would pick up these nuances through experience and by watching other people do them, but this can take a while. Instead I thought I would save you the time and just share them with you here. Aren’t I nice?
‘The Split’

A perfect 'Half and Half' split. Not mine of course.
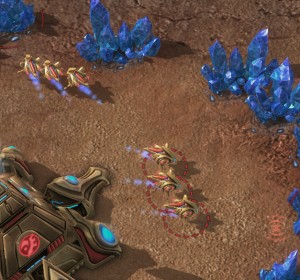
How you send your initial six workers to mine seems like such a small thing and really, it is a small thing. If you box select all of your workers and send them to a mineral patch they will sort themselves out, but this can take a few seconds. To correct this players perform something known as ‘the split’. The specific impact of an effective split is allowing you to start production of your second worker as soon as the first finishes. Take note: Start building your first worker before you send your workers to mine.
The two most common variants of ‘the split’:
- ‘The Half and Half’ – Box all six workers and send them all to a mineral patch to the left of the middle, then as they are traveling box select three and send them to a patch on the right side of the middle. The workers will still have to sort themselves out but much less so than normal. This method is popular because it is relatively easy if you are fairly accurate with you mouse.
- ‘F1 and Send’ – This method speaks for itself, simply press F1 to select a single worker and then send him to a mineral patch. Repeat for each worker, sending each to their own mineral patch. This method is less popular than the ‘half and half’ method because it requires you to be fast and accurate enough to do effectively.
In the beginning practice each a few times against the AI and select whichever one you find the most comfortable. Over time you will find that you will naturally develop your own version of one the above methods.
Edit 1/7/2011: A helpful reader, Jeffery, pointed out that a study of split has shown that the benefit gained is very small. As such, it’s entirely possible for you tip skip this tip completely. I have decided to continue splitting my workers anyway, a decision that seems to be echoed by others. I find it a fun way to start the game and it has become a part of my warm-up routine. It’s also wise to not underestimate the power of being a little bit fancy. Thank you, Jeffery, for the helpful feedback! It goes a long way towards making my site a better place to learn SC2.
Rallying Your Workers Correctly and Creating ‘Worker Pairs’
Rallying the first two workers that you build to empty (not being mined from) mineral patches can give you an extra economic advantage at the beginning of the match. At that point in the game you are not usually doing anything else anyway so there is no reason to not do this.
The second part of this is creating ‘Worker Pairs’. Worker pairs are two mining workers that are perfectly in sync, that is, right as one worker finishes mining the other one begins. Workers will eventually pair up themselves, but only after considerable shuffling about. You can manually create a worker pair by rallying a worker that is about to finish building to a patch that has a worker that is just about to finish mining. This will take some practice to get the timing down. You should only worry about this if you are not doing anything else at the time. Although it will help your income it is not significant enough to get distracted over.
‘Maynard Transfer’

Try to time your transfer so they start mining right as it finishes. Profit!
Named for its creator, the Maynard transfer involves overproducing workers at one base so that you can transfer them to an expansion base when it completes. Transferring workers in this way means that you can start reaping the economic benefits of an expansion immediately.
This technique is the standard now for nearly all top players and you should be doing it too. Simply continue producing workers at your main base and then transfer over 10-15 workers from your main to your expansion. Do this every time you expand and your economy will never dry up. This is also another great reason why you should never stop building workers.
Starting Buildings Right on Time
This is one of those things that will really make a noticeable difference, namely in how fast you can execute your build You want to start construction of each building at the exact moment that you have enough resources to do so. Basically, you always want your workers to be building right underneath themselves, every second spent travelling to build is wasted time.
In order to do this send your worker out to where you want to build the building before you have the correct amount of resources. Ideally you want your worker to arrive right as you get enough to build. But this sort of accuracy takes experience and practice, so don’t stress too much if you don’t get the timing right at first.
Giving Your Ranged Units Space
This one may not be as little as the others, because it can provide a great number of benefits. What happens normally is that your units will get rallied to a point in or just outside of your base where they end up in a big bunch. The problem with this is that they have no room to manoeuvre around or retreat if the opponent attacks, severely limiting their effectiveness.
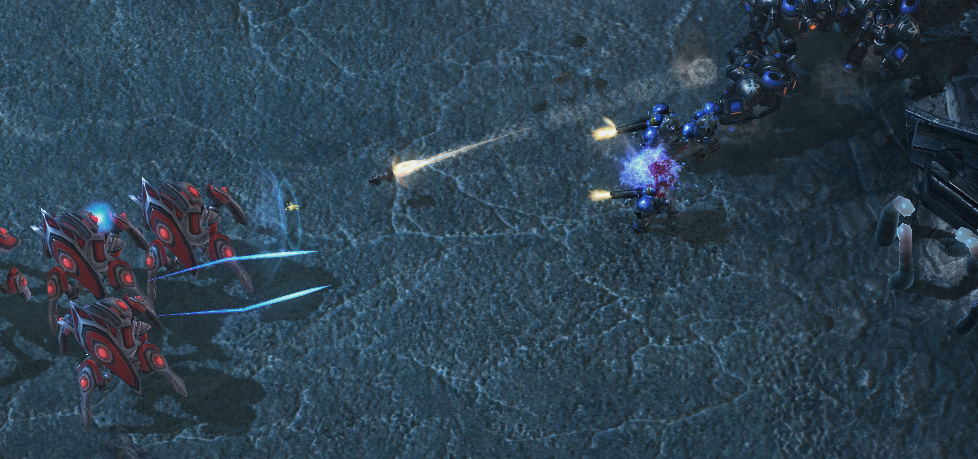
It is much better to get into the habit of moving your units out towards your enemy, particularly if they are ranged units. Doing so gives them room to move around, gives you the space to kite enemy units (attack while staying out of range of their attacks) and it gives you an early warning of incoming attacks. Once you do spot an attack you can simply pull back to defend. Doing this has also seemed to help with breaking the passive mindset that has been a problem for me since I first started playing.
In Daily #189 “Newbie Tuesday: Losing to Early Pressure” Day[9] discusses how moving out with your units can help you deal with an early attack. Definitely worth checking out if this is a problem for you.

Stalkers out range Marines so you should always move them out against Terran.
Compensating for Lacking Hand Speed
This is a technique that you should employ if you find that you are simply not fast enough to keep up with the build you are trying to perform. If you are not fast enough what happens is that your resources will begin to build up simply because you cannot build as fast as the person who created the build. Remember, not everyone can play as fast as the pros. The problem is that most new players will not compensate for this difference in hand speed and will just ignore or waste the extra resources.
All you have to do to compensate is to add an extra production facility to your build so you can spend those extra resources. It is much better to do the build ‘incorrectly’ and spend that extra money rather than to just ignore it and try to play faster. Being aware of your limitations is a good skill to have! If, over time, you find that the extra production building does not see any use then you are most likely getting faster and you don’t need to compensate any more.
How familiar were you with the tips in this article? If you know of any more let me know in the comments below, I’d love to hear them!

